
Loose compression in multi cable transit sealing modules 1 rarely announces itself. Our test bench regularly catches frames that look intact yet leak. Fix it early and keep certification and uptime.
يظهر الضغط غير المحكم في وحدات إحكام مرور الكابلات المتعددة على شكل فجوات حول رصة الوحدات، أو مشبك إسفيني غير مثبت بالكامل، أو براغي تبدو مرتخية. أصلح ذلك عن طريق فك وحدة الضغط، وإعادة تزييت الوحدات وإعادة ترتيبها، ثم أعد إحكام الربط بخطوات متقاطعة صغيرة حتى التوقف الكامل.
That is the short version. The longer version matters more, because a transit that “looks tight” can still fail a pressure or fire test IATF 16949 2. Below, I walk through the signs, the root causes, the correct retightening procedure, and when a drop-in replacement makes more sense than another round of repair.
ما العلامات التي تخبرني أن ختم مرور الكابل الخاص بي قد فقد الضغط؟
خلال final inspection last year, one of our QC technicians pushed a module stack sideways with her thumb. It shifted under light pressure. That frame never left our factory.
علامات فقدان الضغط تشمل فجوات مرئية حول رصة الوحدات أو إسفين الضغط، الوحدات التي تتحرك باليد، مشبك إسفين غير مثبت بالكامل، براغي ضغط مرتخية، انتفاخ مطاطي مفقود، وتسرب أو فشل في اختبارات الضغط أو مقاومة الحريق بعد أن اعتُبر الختم مكتملاً.
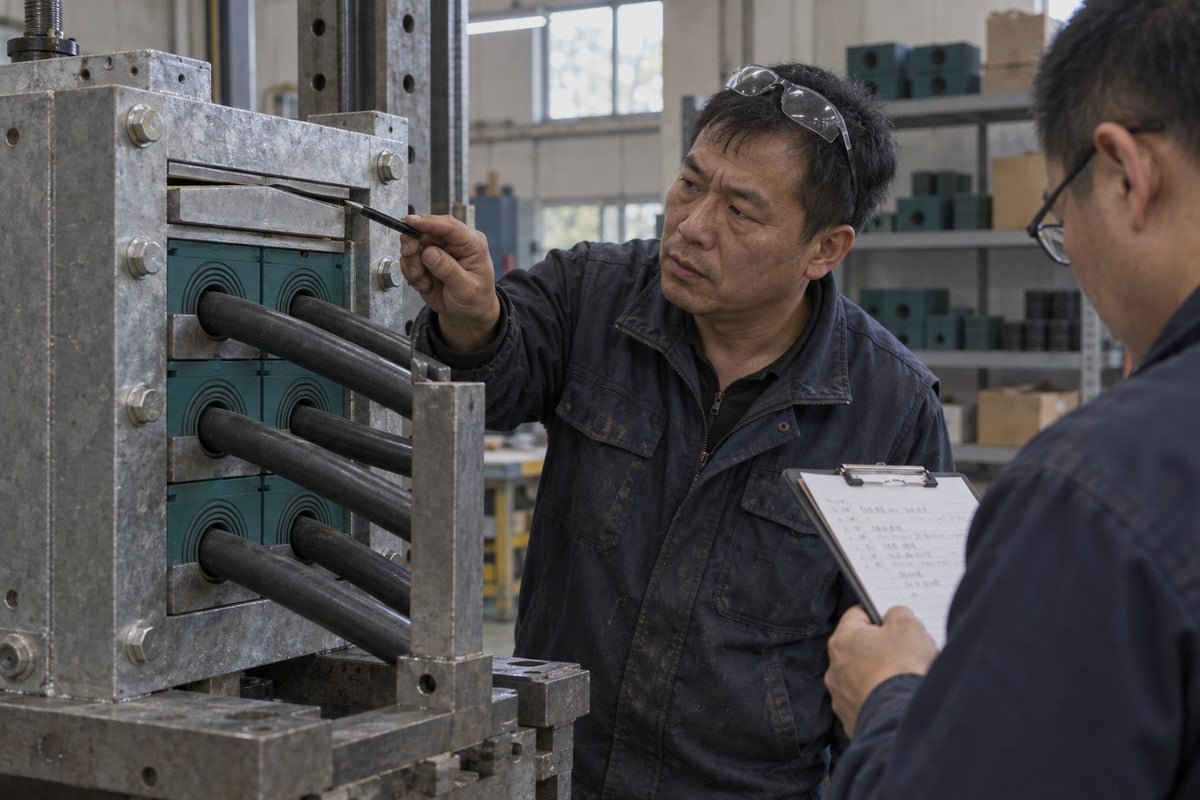
A cable transit works by squeezing elastomer blocks against each cable and against the frame. Take away some of that squeeze and the barrier opens up. The problem is that the opening is usually small. You will not see daylight through it. So you need a structured way to look.
Visual cues on rectangular and round transits
The cues differ by transit type, and I recommend confirming the type before you inspect anything. On our TSC square modules inside a rectangular frame, the compression wedge and its clip are your main indicator. On our TSR round sealing assemblies, the rubber itself tells the story.
| Transit type | Tightening element | Sign of correct compression | Sign of loose compression |
|---|---|---|---|
| Rectangular frame with square modules | Compression wedge, wedge screws or clip | Wedge clip fully seated; depth marks aligned | Clip standing proud; wedge not at full stop; gap above top stay plate |
| Round sealing assembly | Compression screws or nuts | Rubber bulges evenly at both faces | Flat, sunken, or uneven rubber face; screws turn without resistance |
| Compact or single-cable seal | Screws or nut | Firm resistance at the stated torque | Nut spins freely; cable moves in the seal |
Also check for lubricant squeeze-out at the module interfaces. A thin, even line of lubricant for cable seals at each joint is a good sign. It means the modules slid into position and shared the load. Dry, chalky joints often mean high internal friction. That friction blocks uniform pressure across the frame, so one row can be tight while the next row is loose.
The manual pull-test
I ask every crew to do a light pull-test on each cable. Grip the cable near the frame and pull gently. A properly compressed module resists. If one cable slides while its neighbours hold, that module was probably over-peeled or sized wrong for the cable diameter. Localized loosening almost always points to a sizing error, not a torque error. Good pull-out resistance across all cables tells you the stack is doing its job.
When eyes are not enough
Here is the tension I hear from buyers: visual inspection is fast, but is it sufficient? For a general-purpose wall it may be. For a fire boundary, a hazardous-area wall, or a BESS container that must hold an IP68 ingress protection rating, I say no. Micro-voids in the seal are invisible. An ultrasonic leak detector picks up the high-frequency hiss of air passing through those voids. It takes minutes and settles the argument. In safety-critical work, we also recommend pressurizing one side of the transit as the formal check. I cover that method later.
لماذا يفشل الضغط في وحدات عبور الكابلات المتعددة الخاصة بي بمرور الوقت؟
Every time we tune a new EPDM compound recipe, we weigh rebound against softness. Softer rubber seals easier at first. Firmer rubber holds compression longer. That trade-off explains many field failures.
يفشل الضغط في وحدات عبور الكابلات المتعددة بسبب الشد الأولي غير المكتمل، وإضافات الكابلات التي تغير ارتفاع الرصة، وزحف المطاط المرن في المطاط المتقادم، وفقدان مواد التشحيم أثناء إعادة العمل، وحجم الوحدة الخاطئ، ومساحة التعبئة الفارغة، والاهتزاز أو الدورات الحرارية التي تفك براغي الوتد ببطء.
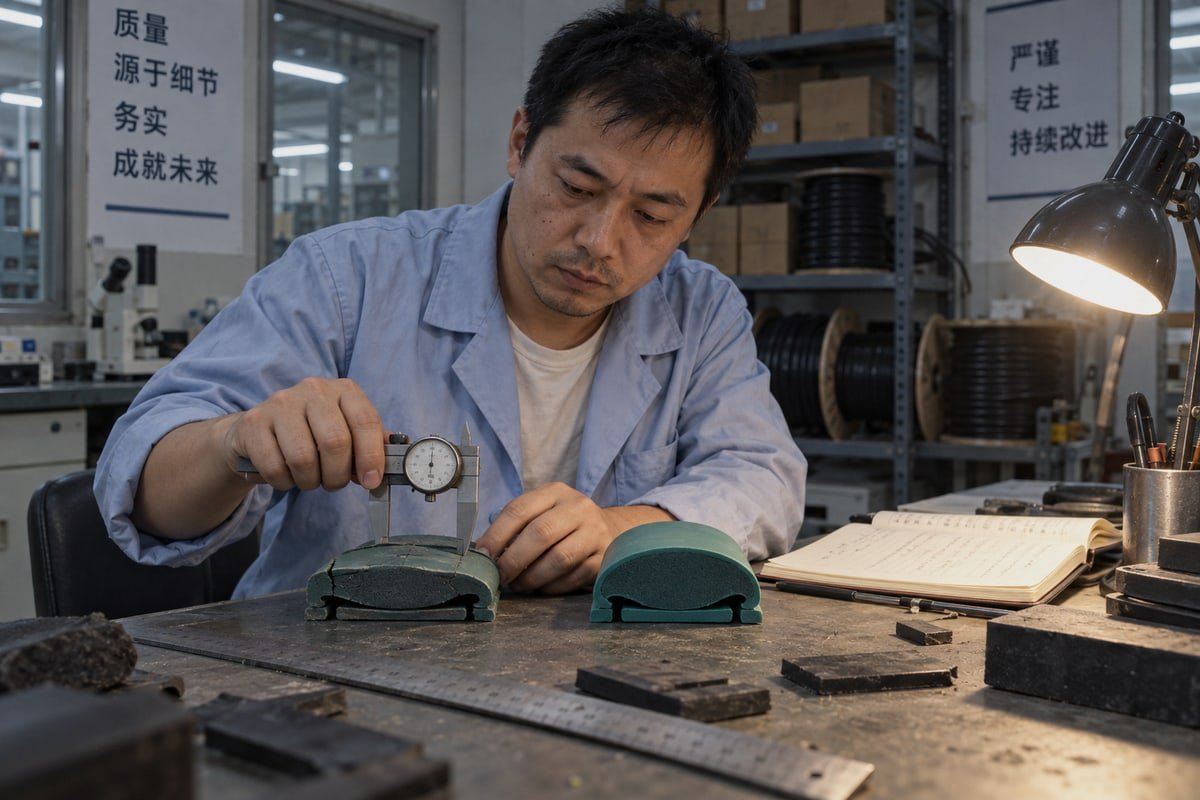
Compression is not a "set and forget" property. It is a balance between the force the wedge applies and the force the rubber pushes back with. Anything that changes either side of that balance can leave you with loose compression in multi cable transit sealing modules. I group the causes into three families: installation errors, service changes, and material aging.
The three families of compression loss
| Family | Typical cause | What actually happens inside the frame | Where to look first |
|---|---|---|---|
| Installation error | One bolt tightened fully before the other | Wedge tilts; one side compressed, other side loose | Wedge alignment and depth marks |
| Installation error | Empty packing space or missing stay plates | Wedge bottoms out before it loads the module rows | Top of the stack, count rows against drawing |
| Installation error | Gap rule ignored | Module halves already touching before compression; no room for elastomer deformation | Module joints, look for zero-gap halves |
| Service change | Cables added or removed | Stack height changes; old wedge position no longer loads the stack | Maintenance log, recent cable work |
| Service change | Modules reinstalled dry | Friction stops load from distributing | Joint faces, absence of lubricant squeeze-out |
| Material aging | Elastomeric creep or compression set | Rubber loses rebound; pushback force drops | Age of install, rubber hardness, flattened blocks |
| Environment | Vibration, thermal cycling, impact | Bolts back off; frame and rubber move at different rates | Wedge bolt torque, witness marks |
The gap rule and packing space
Two installation details cause more callbacks than anything else in my experience. First, the gap rule. Before compression, there should be a small space, roughly 0.1 to 1.0 mm, between the module halves. That space is what lets the elastomer deform and grip the cable. If the halves are already in hard contact, the wedge has nothing to work with. Second, the packing space must be completely filled with modules and stay plates. Any empty volume means the compression wedge simply expands into air. It reaches its full stop, the crew sees the visual cue, and the rows below still carry no load.
Rubber does not last forever
This is where our compound choice matters. The step-core, EPDM خالٍ من الهالوجين 3 we run in the TSC and TSR series is formulated for rebound, but no elastomer is immune to compression set. After years under load, especially in hot switchgear rooms or offshore heat, the rubber relaxes. The wedge is still where you left it, but the rubber pushes back less. That is elastomeric creep. In older installations, a scheduled re-torque of the wedge bolts is the practical answer, and a hardness check tells you when re-torque is no longer enough.
Cable jacket hardness
One point that surprises many buyers: the cable itself affects compression. Low Smoke Zero Halogen jackets are stiffer than standard PVC. A rigid jacket does not conform to the module core as easily, so the same torque yields less effective grip. Our module sizing chart accounts for this by narrowing the recommended diameter window for LSZH cables, and we advise a careful cable diameter measurement before selecting the module rather than reading the nominal size off the cable label.
كيف يمكنني بشكل صحيح إعادة شد العزم أو إعادة إحكام ربط كتلة إحكام MCT المفكوكة؟
A European buyer once sent us a photo of a wedge driven home on one side only. His crew had cranked a single bolt. We rewrote our instruction sheet.
لإعادة إحكام كتلة إغلاق MCT مرتخية، قم بفك وحدة الضغط أولاً، وتحقق من أن كل وحدة ولوح تثبيت مثبت ومزيت، ثم أحكم ربط مسامير الإسفين بخطوات متقاطعة صغيرة ومتناوبة حتى التوقف الكامل أو استقرار مشبك الإسفين. لا تتجاوز حد عزم الدوران، وغالباً ما يكون 20 نيوتن متر.

I want to address the most common objection head-on. Many technicians prefer a quick retighten: put a wrench on the bolts, snug them up, move on. I understand the appeal. But our service guidance, and every major manufacturer's guidance I have read, says the same thing: decide first whether the seal's integrity is compromised. If the rubber is damaged or the stack is wrong, more torque just hides the problem. So the procedure below starts by loosening, not tightening.
The retightening procedure
- Confirm the transit type and pull the original installation drawing or packing record.
- Loosen the compression unit fully before you touch any module. Never rearrange a stack under load.
- Remove the compression wedge and only the sealing material you need to reach the problem row.
- Keep every removed module and stay plate sorted in its original order. Lay them out on a clean surface in sequence.
- Inspect each rubber part. Hardened, cracked, or permanently flattened modules go in the replacement pile.
- Verify the module size against the cable diameter measurement and the module sizing chart. Correct any over-peeled core.
- Re-lubricate every rubber part you removed. Dry reinstallation is one of the top causes of uneven compression.
- Reinsert modules and stay plates so the packing space is completely filled with no voids.
- Fit the compression wedge and tighten in small alternating steps, crosswise, never one side fully at once.
- Stop at the full stop or when the wedge clip seats. Respect the stated wedge bolt torque limit.
- Verify the seal using the method your application requires, then record the result.
Wedge bolt torque and the full stop
Torque numbers vary by system, so read the instruction sheet for the specific frame. Some installation guides state that tightening should not exceed 20 Nm. The more important instruction is to stop at the full stop rather than chase a number. The full stop is the point where the wedge is fully expanded and the rubber has taken up the available deformation. Going past it does not add sealing force. It damages the rubber and shortens the life of the installation.
| Situation after tightening | What it means | Action |
|---|---|---|
| Wedge reaches full stop, clip seats, rubber shows even squeeze-out | Correct compression | Verify and document |
| Wedge stops early, bolts hit torque limit | Stack too tall or a module mis-sized | Loosen, recheck sizing and row count |
| Wedge reaches full stop but seal still loose | No residual bolt travel; stack too short | Re-pack with higher-volume modules or add stay plates |
Residual bolt travel
That third row deserves a closer look. Measure how much travel remains on the compression unit. If the wedge is fully expanded and the seal is still loose, the compression window is gone. Retightening cannot recover it. The transit needs re-packing with more or larger modules so the wedge has something to push against again. This is the point where many crews lose time, because they keep re-torquing a wedge that has nowhere left to go.
Verify with pressure, not eyes
Once tightened, verify. For a gas-tight seal or a watertight boundary, pressurize one side of the transit and watch for pressure drop or use a leak detector on the other side. Our own factory test rigs check the TSR and TSC series across the 0.01 to 0.4 MPa range, and we make those test documents available on request. A visual check is the first gate. It should not be the last gate on a fire boundary or a hazardous-area wall, where firestop integrity and marine cable transit standards demand a recorded result, not a photograph.
هل يمكنني استبدال وحدة إغلاق معطلة بوحدة متوافقة قابلة للتركيب المباشر بدلاً من إصلاحها؟
We learned early, back when we started in 2013, that a spare module is only useful if it fits the frame already on the wall. Dimensional compatibility beats low price.
Yes. If the rubber is hardened, cracked, deformed, or the wedge has no residual travel, replace the module with a drop-in unit dimensionally compatible with your 120-frame standard. Confirm cable diameter range, fire rating, IP68 ingress protection, and test documents before installing it.

Reuse versus replacement is a real trade-off, and I will not pretend otherwise. Reusing existing modules cuts downtime and cost. But reusing aged or damaged rubber puts a compromised part back into a barrier that protects people and equipment. The honest answer is that the rubber decides. If it still rebounds, is within its diameter window, and shows no cracks, reuse it after re-lubrication. If not, replace it.
Repair or replace: the decision table
| Condition found | Repair (retighten) | Replace module |
|---|---|---|
| Wedge backed off by vibration, rubber healthy | نعم | لا |
| Cables added, stack height changed, rubber healthy | Yes, after re-sorting | لا |
| Rubber hardened or shows compression set | لا | نعم |
| Rubber cracked, torn, or deformed | لا | نعم |
| Module over-peeled below cable diameter | لا | Yes, correct size |
| Wedge at full stop, no residual travel | لا | Yes, re-pack with higher-volume modules |
| Fire boundary due for re-certification | Only with recorded verification | Preferred if any doubt |
What drop-in compatible actually means
Buyers who read spec sheets before replying, and most of the purchasing engineers I work with do, ask a fair question: how do I know a second-source module will actually seal in a frame from another supplier? Three things answer that question. First, dimensional compatibility with common 120-frame standards, so the module sits in the existing frame cutout without adapters. Second, a model cross-reference table that maps the existing module code to the DEWIN equivalent, so the stack height and diameter window match. Third, free validation samples. I would rather a sourcing team install a sample in a test frame and pressurize it than take my word for it. We supply CAD and STEP files with the sample so the packing drawing can be updated before the crew arrives on site.
Certification does not stop at the frame
This is where speed of maintenance meets compliance. A fast on-site swap is fine, but in a regulated environment the replacement must carry the same performance as the original. Our factory runs ISO 9001 4 and IATF 16949 systems and is BV-approved. The modules are tested to A-0 and A-60 fire ratings 5 and IP68, with watertight and gas-tight sealing from 0.01 to 0.4 MPa. Ask for those documents before the swap, not after. Then record the new module codes on the transit nameplate or in the maintenance log, so the next inspector can trace the stack.
Cost, lead time, and spare parts
Second sourcing is not only about the moment of failure. Integrators building BESS containers or modular data centers tell me that spare sealing module availability decides whether a leak is a two-hour fix or a two-week outage. Because we make our own molds in-house, we can produce custom sizes and private-label spares, and we ship with export documentation handled. The 40 to 60 percent cost difference against original-brand spares matters, but the lead time reliability matters just as much when a boundary is open.
الخلاصة
Loose compression hides in plain sight. It quietly undoes fire, water, and gas protection. Inspect after cable changes, retighten crosswise, verify by pressure, and replace aged modules with drop-in units.
الحواشي
1. Wikipedia entry providing a technical overview of multi-cable transit systems and their sealing functions. ↩︎
2. Official site for the automotive quality standard ensuring high-level production consistency for safety-critical components. ↩︎
3. Scientific overview of EPDM properties, including rebound and compression set characteristics in engineering applications. ↩︎
4. Official ISO page for the quality management standard governing the manufacturing processes mentioned in the article. ↩︎
5. Authoritative reference for fire-resistance classifications like A-60 used to certify cable transit integrity. ↩︎



 English
 Español de México
 Deutsch
 Français
 العربية
 Русский