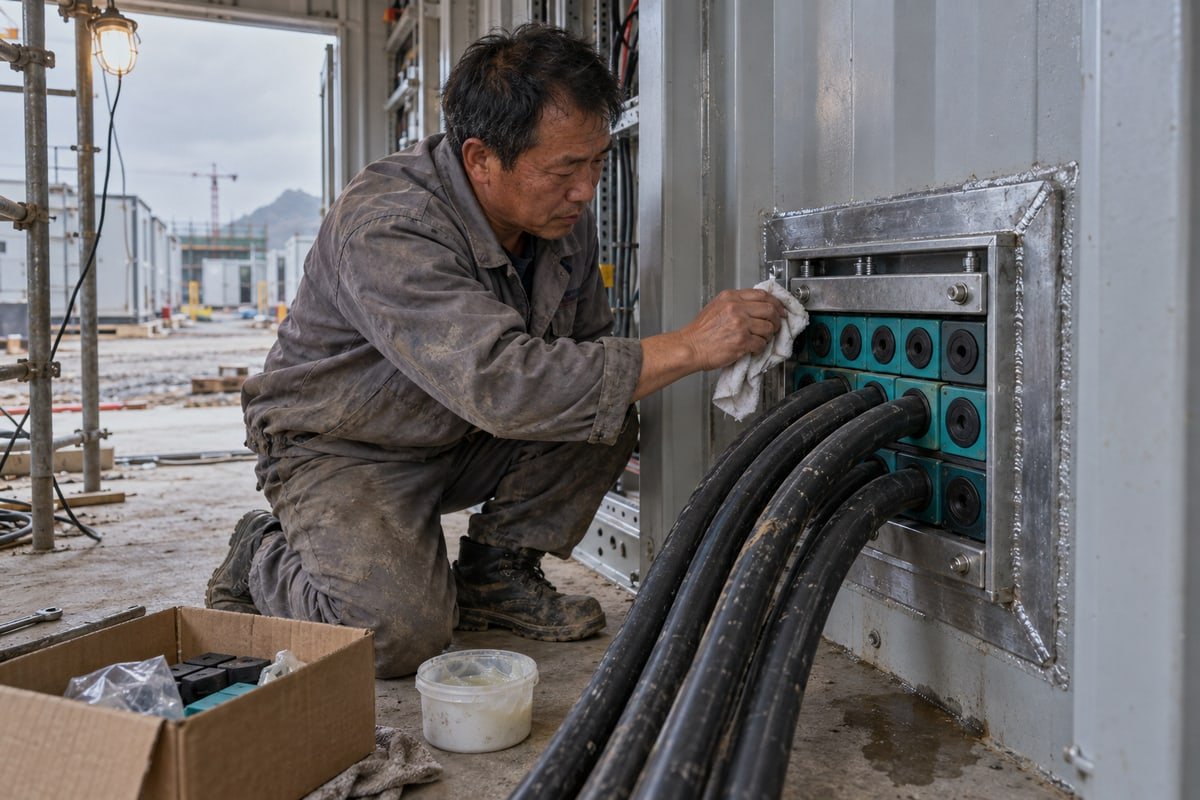
Crews pull new cables through a multi cable transit, then cannot restore the seal after cable pulling. Water follows. Our factory ships spare sealing modules for this failure weekly.
To restore the seal after cable pulling in a multi cable transit, clean the frame and modules, apply approved MCT lubricant, refit correctly sized sealing modules and stay plates, tighten the compression wedge evenly to the specified torque, then verify and wait 48 hours before pressure loading.
That one sentence hides a lot of detail. Each step has a reason, a tolerance, and a way to get it wrong. Below I walk through the full sequence, the checks that prove the seal is good, the spare parts I tell buyers to stock, and the mistakes I see most often when cable sizes change.
What steps do I need to follow to reseal my MCT module correctly after pulling new cables through it?
On our Shaanxi assembly line, every TSC module passes a fit check before packing. That same fit check is the first thing I ask field crews to repeat after resealing.
Reseal an MCT module in seven steps: identify the transit model, clean the cable transit frame and module faces, apply approved MCT lubricant, size and place sealing modules around each cable, fit stay plates between rows, tighten the compression wedge gradually, then inspect and record the packing layout.
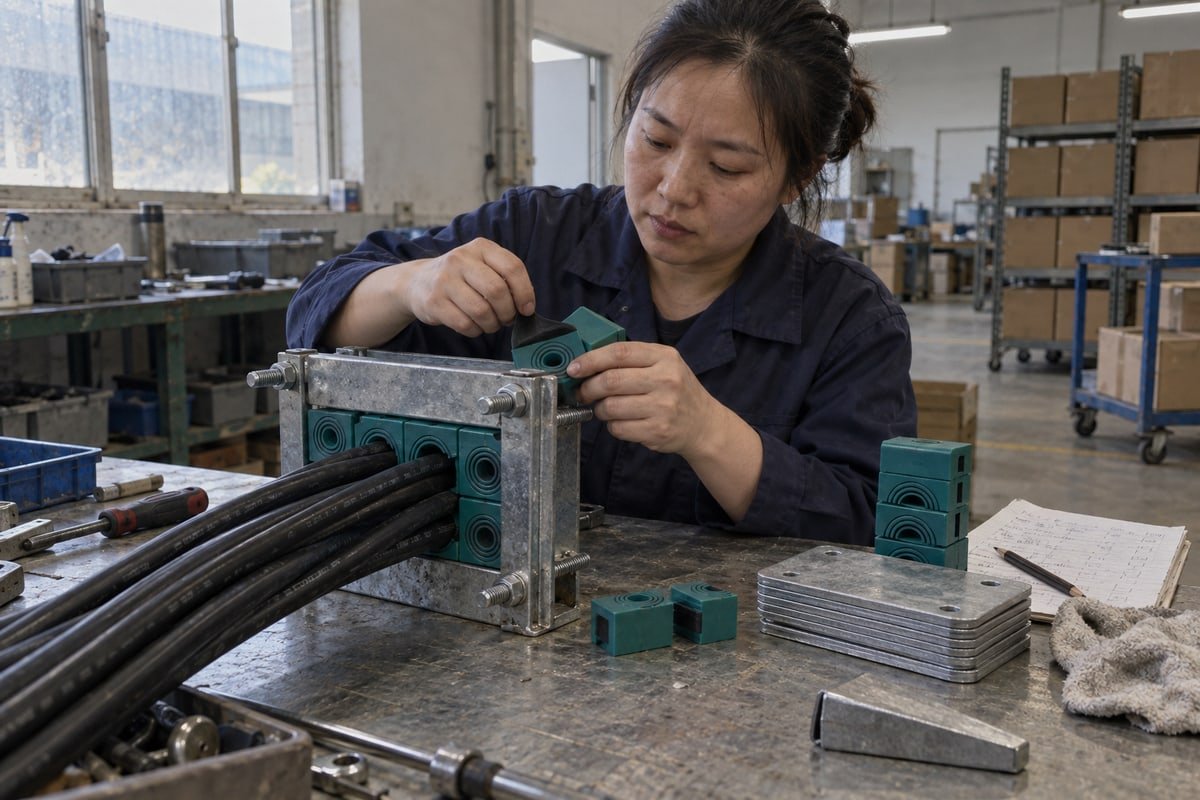
Resealing is not the same as first installation. During first installation the frame is clean, the modules are new, and the packing plan is fresh. After cable pulling, the frame carries grit, old MCT lubricant, and often cable-pulling tensioning fluid. The modules may be deformed from months under load. So the order of work matters more, not less.
The seven-step sequence in detail
| Step | What I do | Why it matters |
|---|---|---|
| 1. Identify | Read the nameplate, confirm frame size and module series | Torque values and lubricant differ by system |
| 2. Clean | Wipe frame interior, stay plates, wedge, and every module face | Grit and pulling fluid create leak paths and stop uniform compression |
| 3. Lubricate | Apply approved MCT lubricant to all internal surfaces, including stay plates and wedge | Controls friction so pressure spreads evenly across the whole block |
| 4. Size and place | Peel step-core layers to match cable outer diameter; center each cable | A cable off-center or outside the module range leaves a gap |
| 5. Stay plates | Insert one between every row of modules | Prevents blocks migrating or popping out during compression |
| 6. Compress | Insert the compression wedge and tighten in small, even steps | Uneven tightening twists modules and leaves one side loose |
| 7. Inspect and record | Check for twisted modules, flush wedge, even protrusion; log the layout | Protects spare capacity and fire rating for the next job |
Why cleaning comes before anything else
A firestop system 1 and a watertight cable penetration both depend on rubber pressing against clean steel. Our halogen-free EPDM modules 2 seal by compression, not by adhesion. If a film of pulling lubricant sits between the module and the frame wall, the rubber slides instead of gripping. The joint looks closed but it is not energized. I tell crews to use the solvent listed in the installation manual and lint-free cloths, then to let the frame dry fully.
Horizontal frames need extra care
In a horizontal cable transit frame the modules want to fall out as soon as the wedge is loosened. Stay plates hold each row in place while you work. I have watched installers skip them to save two minutes and then spend an hour re-packing the whole frame. Fit every stay plate, then check that nothing has shifted before the compression wedge goes in.
How can I verify that the compression and torque on my sealing modules meet IP68 and gas-tight requirements after reinstallation?
A sourcing engineer at a BESS container builder in Germany once asked me why his resealed transit passed a visual check but failed a low-pressure air test.
Verify compression by tightening in small alternating steps to the specified tightening torque, typically 20 Nm on compression screws and 75 Nm on frame bolts, confirm the wedge indicator is fully energized, check module protrusion is even, then pressure-test or ultrasonic-test the penetration after 48 hours.
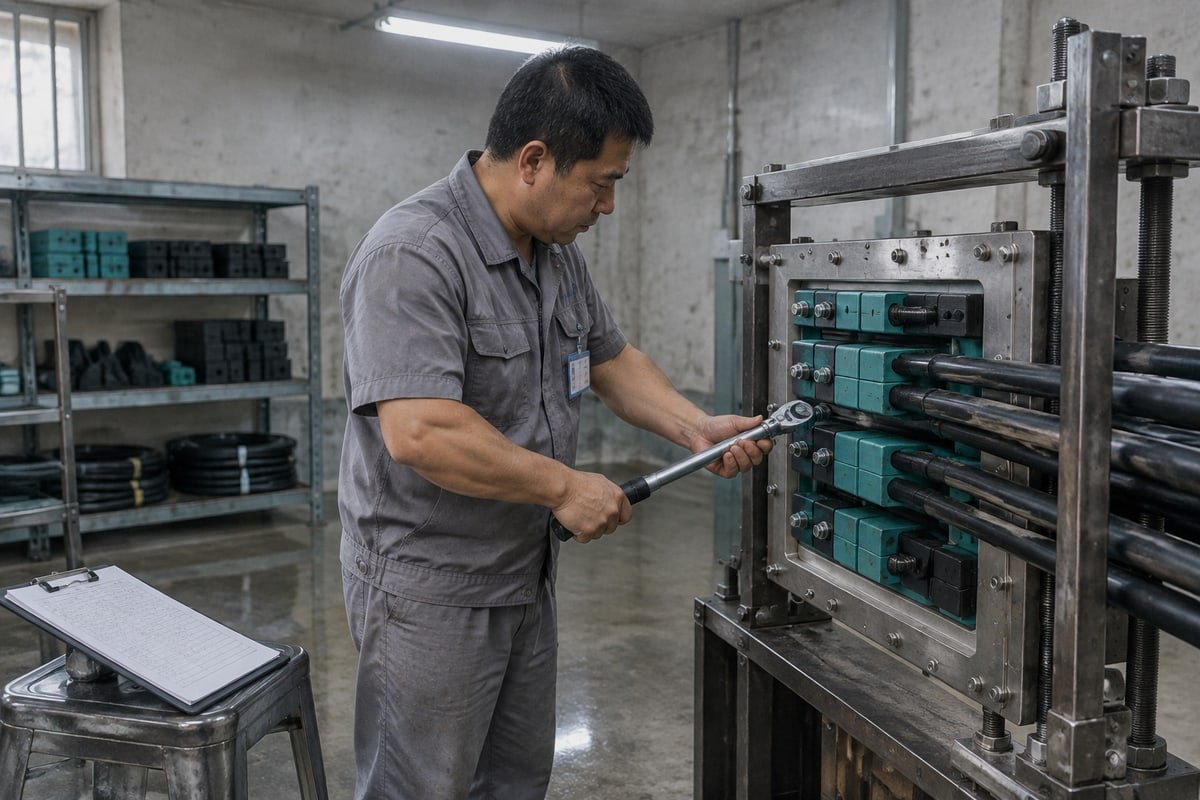
The answer to that German engineer was simple. His crew tightened one bolt to full stop, then the other. The wedge sat crooked, one row of sealing modules was over-compressed, and the opposite row was loose. A visual check cannot see that. A pressure test can.
Torque is a range, not a target you can beat
Over-tightening crushes the EPDM and can crack a compression wedge. Under-tightening leaves a leak path along the frame wall. Neither shows up as a visible gap. The manuals for rectangular surface-mounted frames call for frame bolts at 75 Nm. Compression screws on some systems are taken up in small alternating steps until full stop or 20 Nm. Follow the value for your exact frame, and use a calibrated wrench. When we test our own TSC and TSR assemblies for watertight and gas-tight sealing at 0.01–0.4 MPa, the torque procedure is recorded with every result. The test documents are available on request, and I encourage buyers to ask for them.
A verification checklist I use
| Check | Method | Pass condition |
|---|---|---|
| Even tightening | Alternate bolts in small steps | Wedge flush against frame wall on both sides |
| Wedge state | Mechanical indicator or full-stop | Indicator shows fully energized |
| Module protrusion | Straight edge across the block face | No module twisted or standing proud |
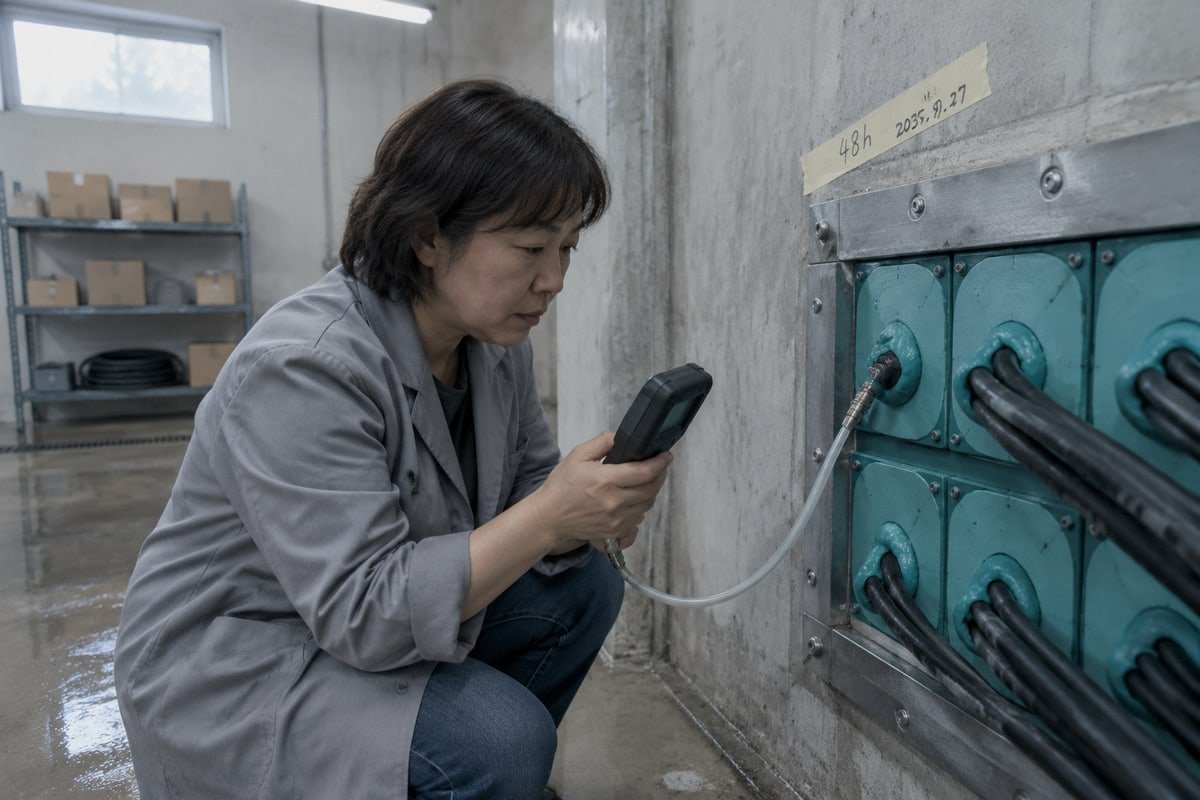
| Pressure equalization | Wait time | Minimum 48 hours before pressure loading |
| Cold-flow relaxation | Secondary torque check | Re-torque at 48 hours, no drop beyond manual limit |
| Leak path | Air pressure test or ultrasonic leak detector | No detectable path at rated pressure |
Why the 48-hour rule exists
Rubber relaxes after compression. Cable jackets show cold flow too, especially soft PVC. Manufacturers state that a penetration should not be subjected to pressure for at least 48 hours so pressure can equalize through the whole block. Below 20°C, some systems need longer. A site manager will push back on this because it delays commissioning. I understand the pressure. But a transit that passes a test at hour two and leaks at day ten costs far more than a two-day wait. Plan the reseal so the 48 hours fall before the pressure test, not after handover.
Ultrasonic testing for IP rating claims
For an IP68 rating 3 and gas-tight performance, a bubble test is a good start. Ultrasonic leak detection finds microscopic air paths that a visual check and even a soap test miss. It is a small tool and it pays for itself on the first offshore or hazardous-area job.
What tools or spare sealing parts should I keep on hand for a proper resealing job during cable upgrades or maintenance?
Stocking spare sealing modules ties up cash. Missing one module stalls a commissioning date. We weigh that trade-off every time we plan a spare kit for a customer.
Keep a calibrated torque wrench, wedge puller, approved MCT lubricant, cleaning solvent and lint-free cloths, a module sizing gauge, plus spare sealing modules in every diameter range used, blank filler modules, stay plates, a spare compression wedge, and replacement frame bolts and washers.

The most common reason a reseal goes wrong is not skill. It is a missing part. The crew opens the frame, finds a torn module, and has nothing to replace it with. So they put the torn one back. I have seen this on data center builds and on switchgear retrofits. The fix is a spare kit sized to the transits on site.
The spare kit I recommend for one frame
| Item | Quantity guideline | Notes |
|---|---|---|
| Sealing modules, each diameter range in use | 10–20% of installed count per range | Step-core EPDM covers a diameter band per size |
| Blank filler modules | Enough to fill all spare capacity | Blanks seal unused packing space |
| Stay plates | One full set for the frame | Cheap, easy to lose, essential in horizontal frames |
| Compression wedge | One | Wedge bolts strip when over-torqued |
| Frame bolts and washers | One full set | Corroded bolts give false torque readings |
| MCT lubricant | One tube per frame | Only the product approved for the system |
| Wedge puller | One per crew | Lets you re-enter without damaging modules |
| Torque wrench | Calibrated, covering 20–75 Nm | Check calibration date before the job |
The lubricant question, answered plainly
Buyers ask me whether a general silicone grease will do. The installation manuals say no, and I agree. MCT lubricant is chosen for controlled friction. It lets the module slide into place, then it lets the rubber grip under compression. A random grease may keep the module slippery under load, or it may attack the EPDM over time. On a certified firestop system, a substitute lubricant can also void the test basis. The tube costs little. Use the approved one.
Reuse or replace?
A module that has been under full compression for years and then pressure-tested has taken a set. It may still look fine. I treat modules from a loaded, tested transit as replaceable parts, not reusable ones. Stay plates and frame bolts can usually be reused if they are clean and undamaged. The compression wedge should be inspected for cracks.
Where second sourcing helps
Many buyers in Europe and the Middle East hold spares for frames built to common 120-frame standards. Our TSC square modules and TSR round assemblies are dimensionally compatible with those standards, so they drop into the same cutouts. We supply a cross-reference table from the existing model to the DEWIN model, free validation samples for qualification, and CAD/STEP files for the design team. That makes it realistic to keep a full spare kit at 40–60% lower cost without changing the frame or losing the IP68 and A-0/A-60 test basis.
How do I avoid common sealing mistakes when cable diameters change or additional cables are added to an existing MCT frame?
The costliest lesson I learned came from a retrofit installation where a crew forced an oversized cable into a module rated below its diameter. It leaked within weeks.
Avoid sealing mistakes by re-measuring every cable outer diameter, selecting sealing modules whose range covers it with at least 10 mm margin from the range edge, keeping spare capacity within the packing space, replacing rather than reusing loaded modules, and logging change against the frame's fill capacity and fire rating.
Cable changes are where most reseal failures start. The original packing plan was drawn for one set of cables. Then a project adds a fiber run, swaps a power cable for a larger size, or removes a cable and leaves a hole. Each change shifts the load inside the block. The frame does not care about your schedule. It only cares whether the packing space is fully and evenly filled.
Six mistakes and how I correct them
| Mistake | What goes wrong | Correction |
|---|---|---|
| Guessing cable diameter | Module range does not match; gap or over-compression | Measure with calipers at three points, use the largest |
| Sitting at the range edge | Thermal movement of the cable pulls it out of seal | Keep the jacket at least 10 mm inside the module sealing range |
| Overfilling the frame | Wedge cannot reach torque; modules distort | Respect the fill capacity stamped on the nameplate |
| Leaving empty space | No compression on neighboring modules | Fill every unused slot with blank modules |
| Reusing a set module | Rubber has taken a permanent shape | Fit a new module from the spare kit |
| No record of the change | Next crew exceeds fill or fire limits | Log cable type, size, and date at the frame |
Why step-core modules help, and where they do not
Our sealing modules use a step-core design. You peel layers until the core matches the cable outer diameter. One module size covers a band of cable sizes, which reduces the number of spare part numbers you must stock. But the band has limits. If the cable sits at the very edge of the band, longitudinal movement from thermal expansion 4 during high-amperage loads can walk the jacket out of full contact. That is why I keep a margin. It is also why cable retention matters. A well-compressed module on a 50 mm cable can hold more than 2000 N of pull-out force, but only if the module size is right and the compression is even.
Retrofit with the seal open, or with the seal cut?
Some systems allow a sealing module to be opened and placed around a cable that is already installed. Others require the block to be split or the hardware cut. Before any retrofit installation, I check which case applies. Re-entering a loaded, tested transit almost always means new modules, because the old ones have been compressed once and pressure-cured. Wedge-puller tools now make re-entry faster without damaging the cable transit frame, but the resealing steps do not change.
Traceability protects the certificate
A firestop system rated A-0 or A-60 is certified for a defined fill. Exceed it and the rating is gone, even if the seal looks tight. I recommend a simple digital transit management 5 method: a QR code on each frame linking to a log of cable types, module sizes, and pull dates. Then the next engineer knows the remaining spare capacity before anyone touches the compression wedge.
Conclusion
Leaks after cable pulling are not bad luck; they are skipped steps. Clean, lubricate, size, torque, wait, verify. Our spare sealing modules and test documents help you do exactly that.
Footnotes
1. Global authority for maritime safety standards, including fire protection and A-60 ratings. ↩︎
2. Technical overview of the synthetic rubber used for sealing modules in transit systems. ↩︎
3. International standards for electrical equipment ingress protection ratings including IP68. ↩︎
4. Professional organization for engineering standards related to electrical cables and thermal behavior. ↩︎
5. International standards for asset management and digital documentation in industrial systems. ↩︎



 English
  Español de México
  Deutsch
  Français
  العربية
  Русский