
Confirming the development timeline and tooling costs for custom multi cable transit products 1 stalls RFQs. Our mold shop sees it weekly: approved prices, then surprise fees. Staged confirmation fixes this.
Confirm development timeline and tooling costs for custom multi cable transit products by requesting a stage-by-stage schedule, a quote that itemizes NRE, mold, sample, and production lines, written tooling ownership, and clear statements on whether lead time includes shipping, testing, and revision loops.
This article walks through each of those steps. I will show how a custom cable sealing system moves from drawing to shipment, where the money goes, and which documents protect your schedule. The goal is simple. You should leave able to verify a supplier’s assumptions instead of trusting a single delivery date.
How long does it typically take to develop a custom MCT sealing module from drawing to first sample?
Last quarter our Shaanxi mold shop cut a new step-core cavity while the customer was still finalizing cable counts. That overlap saved days, but it only works with complete drawings.
A custom MCT sealing module usually takes 2–6 weeks from drawing to first sample when existing step-core tooling or modular inserts are reused, and 6–12 weeks when a new injection mold, frame geometry, or fire-rating validation is required.
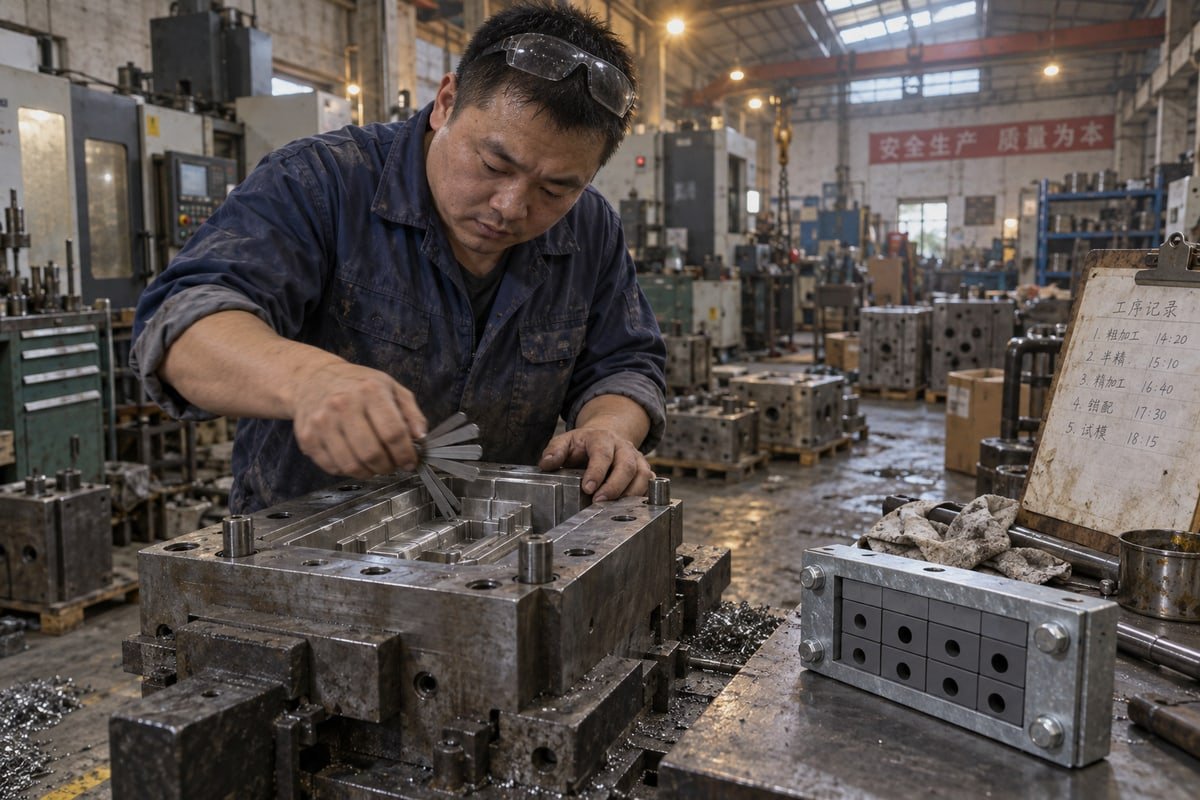
The honest answer to "how long" depends on which stages your project touches. Lead time estimation only works when every stage is named. Here is how the engineering design cycle breaks down for a custom module in our workflow, with industry ranges alongside.
Stage-by-stage breakdown
| Stage | What happens | New tooling needed | Existing tooling reused |
|---|---|---|---|
| RFQ pack and quotation | Drawings, cable count, diameters, ratings received; quote issued | 1–2 days (24–48 hours for a complete pack) | Same day possible |
| Design review and DFM 2 | 3D CAD approval, tolerance check, frame cutout match | 1–2 weeks | 2–4 days |
| Tooling fabrication | Mold base, cavities, fixtures, test jigs | 3–6 weeks | None |
| Prototyping phase / first article | Sample build and dimensional check | 1–2 weeks | 48 hours to 1 week |
| Sample approval and revision | Customer testing, one revision loop | 1–2 weeks | 3–5 days |
| Pilot and bulk run | Production plus outgoing inspection | 2–4 weeks | 1–3 weeks |
Add those rows and you land near the 10–17 week figure many OEM-style custom projects report from finalized spec to ship-ready goods. Reuse the tooling and the same project drops to 6–10 weeks or less. One supplier describes a full custom development cycle of about 5 weeks, but that includes specification, review, sourcing, and build with no new mold. Both numbers are real. They just describe different scopes.
Why the design review stage matters more than buyers expect
The design review and DFM cycle accounts for roughly 20–30% of total development time. That share surprises buyers who think "the mold is the slow part." In practice, a missing cable diameter or an unstated bulkhead thickness sends drawings back and forth. Our step-core, halogen-free EPDM blocks 3 adapt to a range of cable diameters within one module size. That often lets us map a "custom" request onto an existing TSC or TSR module, which removes the tooling row entirely and shortens the prototyping phase. Since our modules are dimensionally compatible with common 120-frame standards, a first sample can frequently ship from stock for validation.
Why a 3-week and a 12-week lead time can both be correct
Some suppliers market very short lead times. Those figures are not lies, but they usually apply to stocked modular seal frames, existing designs, or production-only time. Other suppliers quote long timelines because they count engineering, approval, tooling, inspection, and freight. The buyer's job is to ask one question: which stages does this number include?
What factors influence tooling costs when I request a non-standard frame or module size?
Every non-standard request forces one decision on our engineering desk: modify an existing 120-frame-compatible cavity, or open a fresh mold. The first costs days; the second costs a mold base.
Tooling costs for non-standard MCT frames or module sizes are driven by customization depth: new injection mold design for EPDM blocks, frame machining fixtures, cutting tools, test jigs, material specifications like stainless steel or special elastomers, and the fire, gas, and water ratings that require extra validation.

Tooling cost is not a function of order volume. It is a function of how far your design moves from what already exists. A 500-piece order of a standard TSC block needs no tooling. A 50-piece order of a new module height needs a full cavity set. Below are the specific cost triggers we see, and how each one can often be avoided.
The seven tooling cost triggers
| Cost trigger | Why it adds cost | How to reduce or avoid it |
|---|---|---|
| New EPDM block dimensions | Requires injection mold design, cavity machining, trial shots | Check if step-core range already covers your cable diameters |
| Non-standard frame opening | Frame machining fixtures, weld jigs, new stay plate cutting tools | Specify a 120-frame-compatible cutout where possible |
| Material specifications | 316 stainless, special elastomers for chemical or extreme temperature exposure | Confirm whether galvanized steel and halogen-free EPDM meet the spec |
| Fire rating compliance | A-60 validation needs a test panel build and burn test | Reuse certified module geometries with existing test documents |
| Gas and water tightness | Pressure test jigs sized to the new frame | Ask whether the 0.01–0.4 MPa test rig already fits |
| Custom cable density | Molded multi-hole blocks instead of stackable modules | Use more standard modules in a larger frame |
| Private-label packaging | Print plates, custom cartons | Batch with a repeat-order program |
NRE charges versus amortized tooling
Suppliers price tooling in two ways. Some issue a separate NRE charge as a one-time setup fee. Others roll the mold into the unit price and amortize it over the first order. Neither is wrong. But each changes your unit cost analysis. A separate NRE line makes reorders cheaper because the mold is paid off. An amortized model hides the tooling but raises the unit price until volumes climb. Ask which model applies and what happens to unit price on order two.
Newer strategies that lower tooling exposure
A few trends are worth watching. Rapid additive manufacturing 4 lets us print functional prototypes to catch interference issues before steel is cut, which prevents costly mid-production mold modifications. Hybrid tooling combines 3D-printed cores with traditional frames to shorten lead time for complex, low-volume geometries. Generative design software is being used to trim frame weight, with some sources claiming raw material reductions near 15% before tooling starts. Digital twin simulations of thermal expansion and pressure resistance can also cut the number of physical test iterations. These tools do not remove tooling cost, but they improve production scalability once the design is frozen.
Can I get a cost breakdown before committing to custom mold development?
A sourcing manager in Germany once returned our quote with one line highlighted: 'tooling included.' She asked what 'included' meant. That question changed how we itemize every custom offer.
Yes. A credible MCT supplier should provide an itemized cost breakdown before mold development, separating NRE charges, mold fabrication, sample builds, revision allowances, certification testing, and unit price, and stating whether tooling is one-time, amortized into units, refundable, or owned by the buyer.

A cost breakdown is not a favor. It is the only way to compare two suppliers on equal terms. Low-cost vendors often quote fast but stay vague on tooling ownership, validation, and revision fees. High-spec vendors may quote slowly but list everything. The buyer needs the second kind of clarity at the first kind of speed. Here is the structure I ask our sales engineers to use, and the questions each line should answer.
The breakdown you should receive
| Cost line | One-time or recurring | Question to confirm |
|---|---|---|
| Engineering and DFM | One-time | Is it waived if the order proceeds? |
| Mold or cavity fabrication | One-time | Who owns the mold? Can it be transferred? |
| Fixtures, jigs, cutting tools | One-time | Are they reused for reorders at no charge? |
| First article sample | One-time | How many pieces, and are they free? |
| Revision allowance | One-time per loop | How many loops are included before billing? |
| Certification testing | One-time per design | Is A-60 or IP68 testing quoted or already on file? |
| Unit price | Recurring | Does it change once tooling is amortized? |
| Freight and export documents | Recurring | Which Incoterm, and is customs included? |
Sample approval happens after tooling, so ask about failure
Here is a detail that catches many buyers. Sample approval comes after the mold is built. If the first article fails your validation, the revision may be a simple cavity polish or a full re-cut. Confirm in writing whether one revision loop is included. Confirm what triggers a chargeable second loop. Our answer is usually that dimensional misses on our side are our cost, while specification changes on the buyer's side are quoted separately. Whatever the policy, get it on paper before the mold is cut.
Comparing quotes apples to apples
Two quotes can look 30% apart and actually be equal once tooling amortization is normalized. Run a simple unit cost analysis: total tooling plus unit price times first-order quantity, then unit price alone for the projected second order. That exercise is where the development timeline and tooling costs for custom multi cable transit products become comparable across suppliers. It is also where drop-in second sourcing shows its value. Because our modules cross-reference to common 120-frame models and validation samples are free, a large share of "custom" projects turn out to need no new mold at all, which is how we reach 40–60% lower cost without changing the frame cutout.
What documentation should I request to confirm lead times and avoid delays in custom production?
We learned the hard way that a lead time without a document trail is a promise. A delayed EPDM batch taught our planners to attach material confirmations to every schedule.
Request a stage-by-stage production schedule, a DFM sign-off record, drawing and STEP file revision control, material availability confirmation, first-article inspection report, fire and IP test certificates, Incoterms with freight excluded or included, and a written tooling ownership and revision policy.

Documents are how you turn a verbal lead time into an enforceable one. Each item below closes a specific gap where custom production slips. I have listed them in the order you should request them, because each one depends on the previous.
The documents, in order
- Complete RFQ pack acknowledgment. The supplier confirms receipt of drawings, cable count, diameter ranges, wall thickness, fire and smoke requirements, and installation constraints. A quote issued without this list is a guess.
- DFM and design review sign-off. A dated record showing the 3D CAD was approved and tolerances were checked. This closes the 20–30% of the timeline that hides in review loops.
- Drawing and STEP file revision control. Every revision numbered, with the frozen version referenced on the purchase order. We supply CAD and STEP files on request so your engineers can check the frame cutout before anything is built.
- Material availability confirmation. High-grade stainless steel and specialized elastomers fluctuate with global supply. Ask whether the quoted schedule assumes materials are already in stock or still on order.
- Stage-by-stage schedule. Tooling, first article, approval, pilot, bulk, inspection, and dispatch as separate dated lines.
- First-article inspection report. Dimensional results against the frozen drawing, plus fit check in a 120-frame reference cutout.
- Quality assurance testing records. Fire rating certificates for A-0 or A-60, IP68 ingress protection, and watertight or gas-tight results in the 0.01–0.4 MPa range. Confirm whether these tests are already on file for the module geometry or must be run again, since new testing extends the schedule.
- Incoterms and freight statement. Many suppliers state that production lead time excludes transit. Air adds days; sea adds weeks. Get the Incoterm and the shipping mode in writing.
- Tooling ownership and revision policy. Who owns the mold, where it is stored, and what a revision costs.
What each document protects against
| Document | Delay it prevents |
|---|---|
| RFQ pack acknowledgment | Re-quoting after missing specs surface |
| Material availability confirmation | Mold ready but elastomer batch still weeks out |
| Stage schedule | A single date slipping with no early warning |
| Test certificates on file | Unplanned burn or pressure testing added late |
| Incoterms statement | "Delivered" meaning ex-works when you expected site delivery |
One more question for recurring projects
If your BESS containers, modular data centers, or switchgear panels repeat, ask about buffer stock or a repeat-order program. That moves tooling and transit off the critical path entirely. Our ISO 9001 and IATF 16949 systems and BV-approved factory status mean the quality documents already exist; the buffer program just makes sure the modules do too.
Fazit
Underestimating hidden stages costs projects weeks. Verify each assumption instead. Ask us for a staged schedule, itemized tooling quote, and free validation sample before committing.
Fußnoten
1. Provides a high-level overview of the MCT technology and its industrial applications. ↩︎
2. Explains the critical engineering stage that determines production efficiency and tooling costs. ↩︎
3. EPDM is the primary material for MCT modules; ScienceDirect provides authoritative technical properties. ↩︎
4. NIST is a top-tier authority on manufacturing technology and additive standards. ↩︎



 English
  Español de México
  Deutsch
  Français
  العربية
  Русский