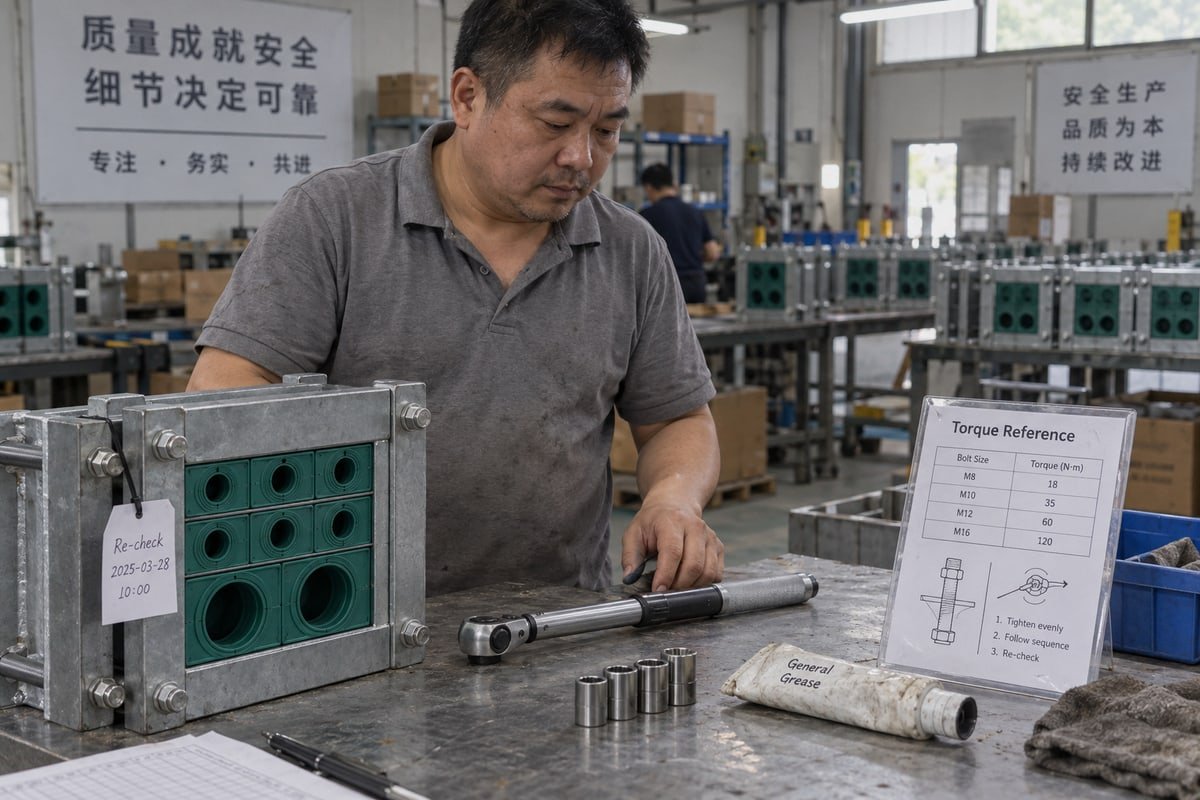
Our production line ships thousands of sealing modules yearly, yet the field failures I trace back rarely involve rubber. Missing installation tools and torque specs cause them.
Installation tools and torque specs for multi cable transits should arrive as one package: model-specific torque tables for compression bolts and stay plates, a calibrated torque wrench range, crosswise tightening steps, approved block lubricant, gap tolerances, a 24-hour re-torque check, and IP68, gas-tight, and firestop test documents.
That is the short answer. The rest of this article breaks it into four questions I hear from purchasing engineers. Each one ends with something you can put into an RFQ.
What torque specifications should I request for compression frame bolts and stay plates?
Last quarter our QC team rejected a batch of compression units because the bolt plating changed the friction coefficient. Same nominal torque, different clamp load. That changed our spec sheet.
Request torque values listed by compression unit model and frame size, not by brand, stated in Nm with a tolerance band, plus separate values for stay plate screws and frame mounting bolts. Published MCT values range from 1 Nm to 35 Nm, so a single universal number is not acceptable.
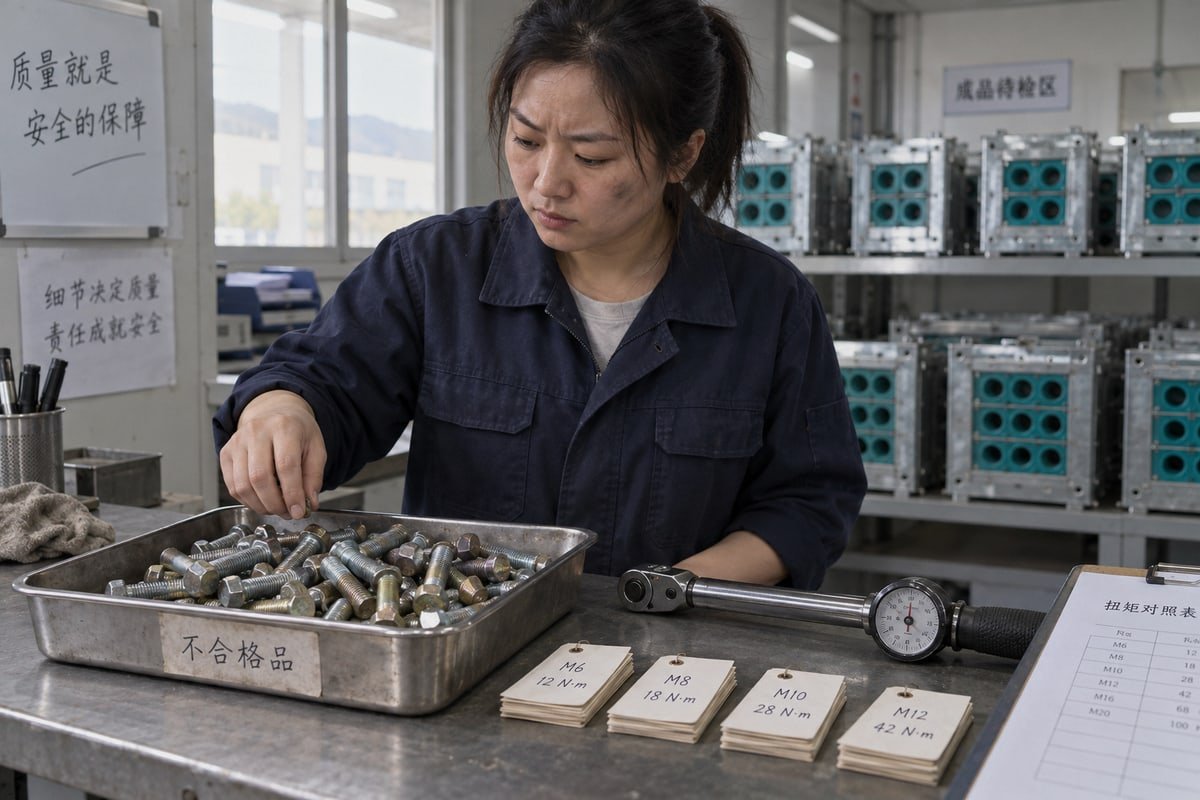
Torque is not a property of the bolt alone. It is a proxy for clamp load on the packing blocks. Bolt size, thread pitch, plating, lubricant, and the hardness of the EPDM stack 1 all change that relationship. So two frames with the same M10 bolt can carry different values. This is why I ask buyers to stop asking "what torque for an MCT" and start asking "what torque for this model at this size."
Why published torque values spread so widely
The table below shows what the market already publishes. I include it because it explains why a generic number is a red flag.
| Source of guidance | Published torque values | What it tells a buyer |
|---|---|---|
| Roxtec installation instructions | 1 Nm, 4 Nm, 7 Nm, 17 Nm, 35 Nm by series and size | Values change with system type, not just frame size |
| MCT Brattberg installation guide | 2.5 Nm to 15 Nm across product sizes | One family can span a 6× range |
| MCT Brattberg fastener document | 20 Nm for certain fasteners | Different fastener classes carry different values |
| Mechanical compression units (general) | 8 Nm to 20 Nm depending on frame size and sealing material | The band most integrators will actually work in |
| DewinMCT TSC / TSR compression units | Listed per model on the installation drawing | We do not print one universal number |
A buyer once told me he wanted one kit and one torque for every transit in a BESS container. I understand the wish. But the manufacturer data above makes the case for me. Torque and installation steps vary enough between systems that product-specific instructions matter more than a generic kit. Our answer is a compact torque card per model, which is easy to laminate and hang beside the frame.
Stay plates and frame bolts need their own line
Stay plates sit between every row of packing blocks. They give mechanical anchoring 2, stop cable pull-out, and keep the seal stack square. In slide-in designs they are not torqued at all. In screw-secured designs they are. So ask which type you have, and request either a seating check or a screw torque value. Frame mounting bolts are different again. They fix the frame to the bulkhead or panel and follow the bolt class and substrate, not the sealing torque.
Ask for the conditions behind the number
A torque value without conditions is half a spec. Request the tolerance band, whether the value assumes lubricated threads, and the ambient temperature range. Also ask whether the supplier adjusts guidance for soft cable jackets. Low Shore A sheaths 3 can cold-flow under sustained compression, and a good spec sheet tells you when to step down or add a re-torque check. Our step-core EPDM blocks accept a cable diameter range within one block size, so the torque card also states the diameter window the value was tested at.
Which installation tools does DewinMCT include or recommend for a smooth MCT assembly process?
There is a trade-off between shipping a full tool kit with every frame and keeping the unit price low. We settled on a middle path, and I will explain it.
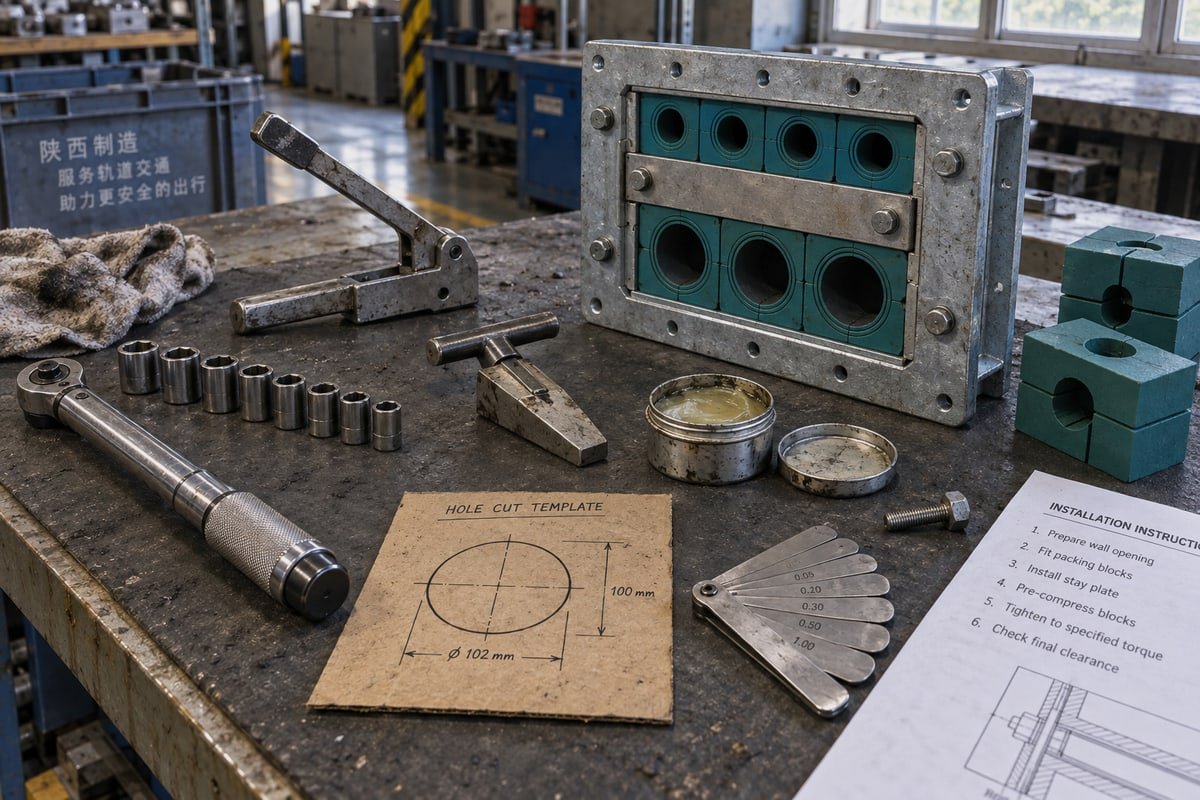
DewinMCT recommends a calibrated torque wrench covering the compression unit range, matching hex sockets, a pre-compression lever for dense frames, a compression wedge insertion aid, approved lubricant for blocks, a feeler gauge for gap checks, and a hole-cut template. Frames and modules ship with an installation sheet listing torque values.
Most of our customers are OEM integrators building BESS containers, modular data centers, or switchgear. They already own calibrated torque wrenches under their ISO 9001 or IATF 16949 systems. Shipping a wrench with every frame would add cost to a component they buy to save 40–60%. So we specify tools by exact type and size, supply the product-specific consumables, and offer the special items on request.
The tool list, sorted by who normally supplies it
| Tool category | Purpose | Our approach |
|---|---|---|
| Calibrated torque wrench | Reach the specified Nm without guessing | Specified by range on the installation sheet; buyer's own or supplied on request |
| Hex sockets / drivers | Match the compression unit fastener head | Size stated per model |
| Pre-compression lever (eccentric or handheld) | Create space for the final compression wedge in full frames | Recommended for dense frames; available as accessory |
| Compression wedge insertion aid | Seat the wedge square without cocking | Available as accessory |
| Lubricant for blocks | Let EPDM blocks slide and compress uniformly | Manufacturer-approved silicone-based lubricant supplied |
| Hole-cut template | Cut the correct opening for the 120-frame cutout | Drawing and CAD/STEP file provided |
| Feeler gauge or gap reference | Confirm 0.1–1.0 mm gap before final tightening | Reference printed on the sheet |
| Marking pen | Record first torque and 24-hour re-torque on the frame | Buyer's own |
Why pre-compression tools matter in high-density frames
A frame full of packing blocks leaves very little room for the last piece. Installers who force the compression wedge in with a screwdriver crack blocks or shear the sheath. The eccentric lever pushes the stack down evenly, the wedge slides in, and only then does the torque wrench come out. This is where the speed-versus-precision argument shows up. Contractors want the fast path. I get that. But the lever actually saves time, because a cracked block means removing the whole stack.
Digital tools and where I draw the line
Some tenders now ask for torque-to-cloud tools that log every bolt for class society inspections or digital twin records. We do not require them. Our installation sheet works with a pen. That said, our torque values and socket sizes are plain numbers, so any digital wrench can log them. RFID-embedded modules for contactless verification are an emerging option. I see them as a record-keeping aid, not a replacement for a correct tightening sequence.
Can I get a documented installation and torque procedure to ensure IP68 and gas-tight sealing performance?
A sourcing engineer at a BESS container builder in Germany once asked me for our torque procedure before he would even open the price sheet. I respected that.
Yes. A documented procedure should cover hole preparation, block selection by cable diameter range, lubrication, stay plate placement between every row, staged crosswise tightening to the specified Nm, a 0.1–1.0 mm gap check, a 24-hour settlement and re-torque, and sign-off tied to IP68 and gas-tight test reports.
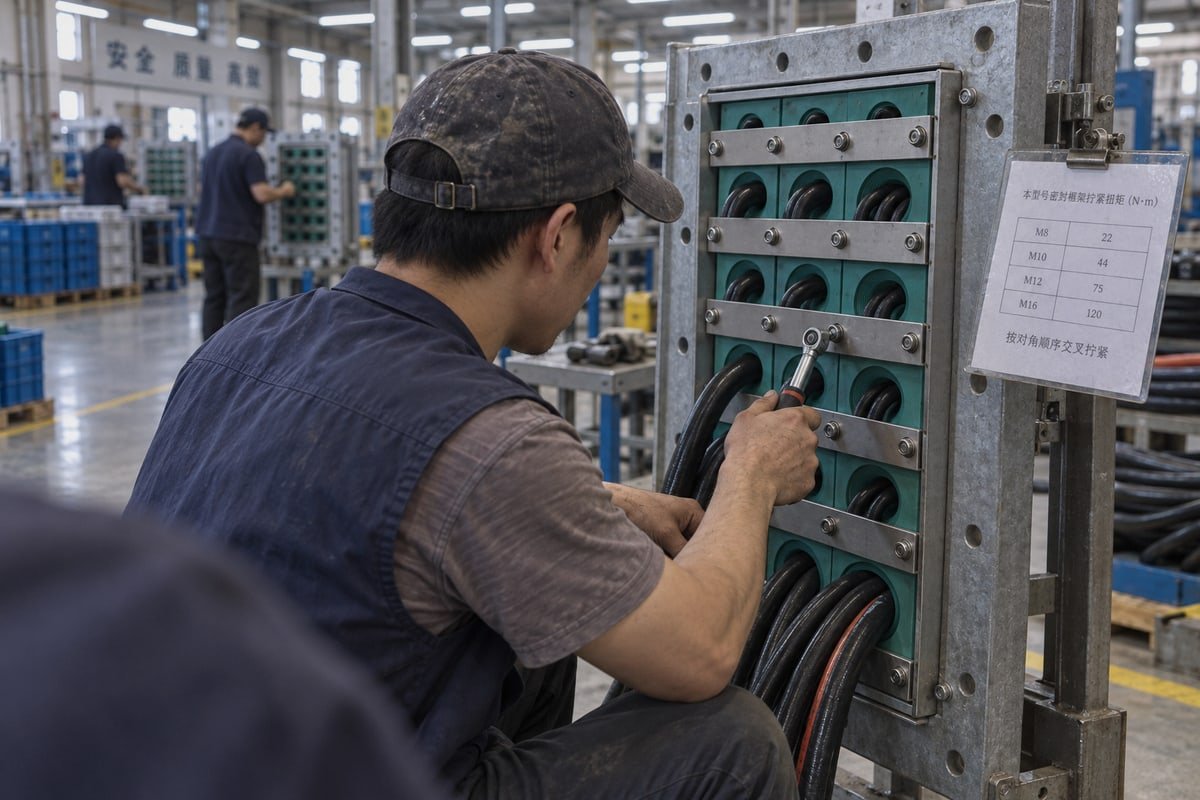
Our IP68 rating and our watertight and gas-tight results at 0.01–0.4 MPa were achieved on frames installed exactly this way at a BV-approved factory. If the field installation deviates, the test report no longer describes what is on the wall. So the procedure is part of the certification, not an add-on. Here is the sequence we document.
The installation sequence in nine steps
- Cut the opening to the drawing. No lubricant on the hole or the outside of the frame.
- Mount the frame square. Check the frame-to-bulkhead bolts to their own value.
- Select packing blocks by measured cable outer diameter, staying inside the block's cable diameter range.
- Apply lubricant for blocks only on block faces that touch other blocks or the frame.
- Route cables to enter the frame at 90 degrees, and support cable weight from the surrounding structure.
- Build rows bottom up, placing stay plates between every row.
- Pre-compress the stack, insert the compression wedge, and confirm the 0.1–1.0 mm gap.
- Tighten crosswise in several passes to the specified Nm, using the same torque on each bolt.
- Mark the bolts, wait 24 hours, re-torque, then release the frame for pressure test or energizing.
Checkpoints that turn a procedure into a record
| Checkpoint | Acceptance reference | Evidence kept |
|---|---|---|
| Cable diameter vs block size | Within the printed cable diameter range | Block list per frame |
| Gap before final tightening | 0.1–1.0 mm | Feeler gauge reading |
| Torque wrench settings | Model value, tolerance band | Wrench calibration date, marked bolts |
| Visual seal indicator | Wedge clip seated, visible thread length within limit | Photo |
| Settlement and re-torque | 24 hours minimum before load | Signed re-torque line |
| Certification link | IP68, 0.01–0.4 MPa, A-0/A-60 test documents | Report numbers on the record |
How long should the settlement period be?
Most manufacturer guides call for 24 hours before exposing the installation to strain or pressure, and for a re-torque check at that point. Some specifications use 48 hours to let the elastomer relax before pressure testing. For vibration-heavy sites or wide thermal cycling 4, I recommend a second check at the customer's first maintenance interval, because EPDM does creep. This is my answer to the install-and-forget view. Tight bolts on day one do not prove a seal on day 400.
The lubricant rule that people miss
Lubricant helps blocks slide and compress evenly. But lubricant on bolt threads changes the torque-to-clamp relationship, and lubricant on the hole or outer frame can defeat firestop certification and marine and offshore standards 5 approvals. Our sheet states where lubricant goes and where it must not go. Please read that line twice.
How do I verify that torque and tooling requirements match my existing 120-frame system for drop-in compatibility?
I learned early that dimensional compatibility means little if the installer keeps the old torque card. Second sourcing has to include the tooling data, not only the drawing.
Verify drop-in compatibility in three steps: compare frame cutout, bolt pattern, and packing block dimensions against the cross-reference table; confirm the torque value and socket size for the DEWIN compression unit against your existing torque wrench settings; then run a free validation sample through your own leak test.

Our TSC square modules and TSR round assemblies are dimensionally compatible with common 120-frame standards. That means the block footprint, stay plate slot, and compression unit envelope fit an existing cutout. What it does not mean is that every fastener on the old compression unit is identical to ours. So verification has two layers: geometry and tooling. Skipping the second layer is the most common mistake I see when a plant switches supplier mid-project.
A verification checklist you can run in one afternoon
| Item to verify | Where to find it | Pass condition |
|---|---|---|
| Frame cutout and depth | DEWIN frame drawing vs existing cutout | Same opening, no rework |
| Packing block sizes | Model cross-reference table (existing model → DEWIN model) | One-to-one mapping for every block in the frame |
| Cable diameter range per block | DEWIN block datasheet | Existing cables fall inside the range |
| Stay plate thickness and count | Frame drawing | Same rows, same anchoring |
| Compression unit bolt size and head | DEWIN compression unit drawing | Socket already in the installer's kit |
| Torque value | DEWIN installation sheet vs old torque card | Wrench range covers the value; card replaced |
| Certification | ISO 9001, IATF 16949, BV approval, A-0/A-60, IP68 reports | Documents on file before first order |
| Physical fit and seal | Free validation sample | Passes your own gap check and leak test |
Why the cross-reference table is the starting point
The cross-reference table maps each competitor model to a DEWIN model. It saves engineering hours, but it is a geometry tool. The installation sheet that ships with the sample is the tooling tool. Put both in front of the installer at the same time. When the two documents sit together, the old torque card gets retired instead of quietly reused.
CAD files and samples close the loop
We provide CAD/STEP files so your mechanical team can drop the frame into the container or panel model and check clearances for the wrench and pre-compression lever. Then we send free validation samples. Some buyers ask whether a factory-direct supplier really supports this step, or just sells hardware. I understand the doubt. Our answer is that in-house mold making, spare module delivery, and English technical support are what make us a qualified second source rather than a low-price supplier. The 40–60% cost reduction only counts if the frame installs with your existing tools and passes your own test.
Fazit
Loose torque data creates leaks, failed inspections, and rework. Ask suppliers for tools, model-specific torque tables, and documented procedures. We ship documentation with every DewinMCT frame and specify the tools.
Fußnoten
1. Technical overview of the synthetic rubber material used in the sealing modules. ↩︎
2. Engineering definition of the anchoring mechanism provided by stay plates in transit systems. ↩︎
3. Explanation of the hardness scale used to measure the flexibility of cable sheaths. ↩︎
4. Scientific context on how temperature fluctuations affect material integrity and seal performance. ↩︎
5. Bureau Veritas is a primary authority for the marine and offshore certifications mentioned. ↩︎



 English
  Español de México
  Deutsch
  Français
  العربية
  Русский